

TerraScan User Guide
Draw Horizontal Section
 Draw Horizontal Section tool creates a top view which shows laser data and vector elements in a limited elevation range (display or viewing depth).
Horizontal sections are useful, for example, to display the exact XY location of vertical objects, such as building walls or poles in MLS data sets. You should open at least one top view and one (vertical) section view before starting to create horizontal sections.
To create a horizontal section view:
1. In the top view, zoom to the area of interest that you want to display in the horizontal section.
2. Use the Draw Vertical Section tool in order to create a vertical section view of the area of interest.
3. Select the Draw Horizontal Section tool.
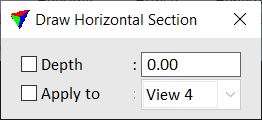
The Draw Horizontal Section dialog opens:
4. Define the center elevation of the horizontal section with a data click in the vertical section view.
5. Define the horizontal section display depth (= visible elevation range) with a data click in the vertical section view or by typing a value in the Depth field of the Draw Horizontal Section dialog.
6. If Apply to is not switched on in the Draw Horizontal Section dialog, identify the view for displaying the horizontal section with a data click.
The selected view is rotated to a top view and displays the defined elevation range.
SETTING |
EFFECT |
|---|---|
Depth |
Display depth or visible elevation range of a horizontal section view up and down from the center elevation. If on, the display depth is fixed to the given value. |
Apply to |
If on, the horizontal section is automatically displayed in the selected view. |
The tool does not apply any XY adjustment to the horizontal section view based on the vertical section location.