

TerraScan User Guide
Write by line
Not UAV
Write by line command writes data from block binary files of a project into files per line sorted into time order. The process creates first temporary files for lines from each block. Then, for each line the temporary files are combined into one final output file.
To write project data by line:
1. Select Write by line command from the Tools pulldown menu.
This opens the Write by Line dialog:
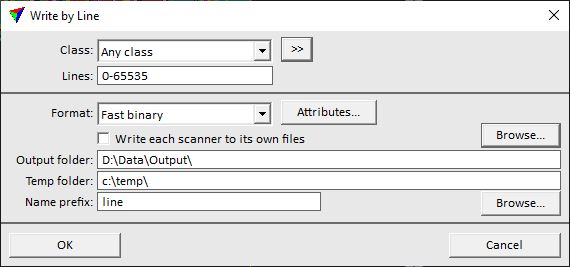
2. Define settings and click OK.
This starts the output process.
SETTING |
EFFECT |
|---|---|
Class |
Point class(es) that are included in the output process. |
|
Opens the Select classes dialog which contains the list of active classes in TerraScan. You can select multiple source classes from the list that are then used in the Class field. |
Line |
Line number(s) that are included in the output process. 0-65535 refers to all lines. |
Format |
New storage format of the binary files per line. The list contains all supported binary formats for project blocks. See Supported file formats for more information. |
Attributes |
Opens the Attributes to write dialog which contains the list of possible point attributes to be stored in the selected format. You may change the pre-selection by switching on/off additional attributes. |
Write each scanner to its own files |
If on, the data is further split into files per scanner. |
Output folder |
Location for storing the final output files. Use the Browse button in order to select or create a new folder. |
Temp folder |
Location for storing the temporary files that are produced during the process. Use the Browse button in order to select or create a new folder. The temporary files are removed when the final output files are created. |
Name prefix |
Prefix for naming the output files. The line number is added automatically to the file name. |
