

TerraPhoto User Guide
Import known lines
Import known lines reads coordinates of points on linear features from a text file and inserts them as tie lines of type Known lines. There is an option for automatic placement of the lines. Alternatively, you need to go through the list of images and enter the tie line positions in each image that sees a known line location.
The command recognizes space-delimited text files where each line stores the coordinates of one known line as:
•Easting Northing Elevation
•Identifier Easting Northing Elevation
To import known lines and enter them as tie lines:
1. Select Import known lines command from the File pulldown menu.
This opens the Import known lines dialog, a standard dialog for opening a file.
2. Select the known lines text file and click Open.
Another Import Known Lines dialog opens:
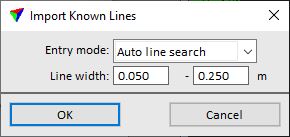
3. Define settings and click OK.
SETTING |
EFFECT |
|---|---|
Entry mode |
Method of Known line placement: •Manual - lines need to be entered manually. •Auto line search - lines are placed automatically. |
Line width |
Distance from the tie line within which the software tries to place tie line pixels automatically. Values can be determined, for example, from the width of paint markings on a road. |
This reads the known line coordinates from the text file and adds them as Known lines to the active tie points.
If the Entry mode is set to Auto line search, the software starts the automatic search for tie lines and adds them to the tie points list. Otherwise, the known lines are added as empty tie line pixels to the tie points list and you need to continue with step 4.
Images that see locations of empty known lines are marked with the asterisk character (*) behind the image number in the list of images in the Tie points window.
4. Scroll through the list of images in the Tie points window until you find an image with an asterisk behind the image number. Select the image.
This displays the tie points for the selected image in the lower list box of the Tie points window.
5. Select a Known line in the active image in the tie points list.
The location of the tie point in the active image is displayed in the Active detail view and in a secondary image in the Secondary detail view .
6. Select Enter position command from the Pixel pulldown menu.
7. Enter the start and end points of the tie line with two data clicks in the active image in the Active detail view.
8. Enter the start and end points of the tie line in all other images with two data clicks in the Secondary detail view. Use the <Arrow-down> key or the mouse pointer to select the next secondary image in the tie points window after placing a tie point in one image.
9. Repeat steps 4 to 8 for all known lines.