

TerraModeler User Guide
Label Area
 Label Area tool measures and labels the size of a bounded area. The tool can be used to label the area of closed elements in the CAD file.
The tool places the area size value and possibly some prefix and/or suffix. The settings for the tool are defined in Drawing utilities / Label Area category of the TerraModeler Settings. The symbology of the label is further determined by the active symbology settings in the CAD file.
To create area labels:
1. Select the Label Area tool.
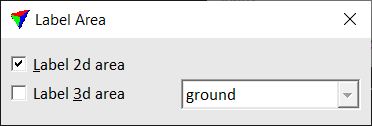
This opens the Label Area dialog:
2. Select the area type for labeling in the dialog.
3. Identify the bounding element which defines the area.
The label is displayed at the mouse pointer location.
4. Define the location of the label with another data click.
This draws the label in the CAD file. You can continue with step 2 or 3.
OR
1. Select the bounding element(s) which defining the area.
2. Select the Label Area tool. This opens the Label Area dialog.
3. Select the area type for labeling in the dialog.
4. Accept the selected element(s) with a data click.
This draws the label(s) in the CAD file. Application places labels inside bounding elements.
Setting |
Effect |
|---|---|
Label 2d area |
The tool measures and labels the 2d area defined by the closed element. |
Label 3d area |
The tool measures and labels the 3d area defined by the closed element that is projected on the given Surface. |