

TerraModeler User Guide
Insert Point
 Insert Point tool adds a new point to a surface model. You enter the X and Y location as a data point. The elevation can be a key-in value or the elevation of the data point.
In addition, the tool can add a leveling text for the new point and optional, a point marker. The settings for the label are defined in Elevation labels category and Insert Point category of the TerraModeler Settings. The symbology of the label is further determined by the active symbology settings in the CAD file.
To insert a point to a surface model:
1. Select the Insert Point tool.
This opens the Insert Point dialog:
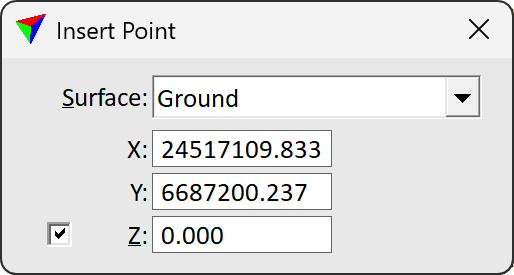
2. Select a Surface model for which to insert new points.
3. Switch on Z and enter an elevation value in order to use a key-in elevation for new points.
OR
Switch off Z in order to use the data point elevation for new points.
4. Move the mouse pointer inside a view.
The XY coordinates a of the mouse pointer location are dynamically displayed in the dialog. The elevation of the data point is displayed at the mouse pointer location.
5. Define the location of the new point with a data click.
The point is added to the model and possibly, a leveling text is drawn at the location. You can continue to step 2, 3, or 4.