

TerraModeler User Guide
View Elevation
 View Elevation tool shows the elevation of a surface model at the mouse pointer location. It also supports the placement of 3D vector elements by deriving surface elevations for the elements.
To view surface elevation:
1. Select the View Elevation tool.
The View Elevation dialog opens:
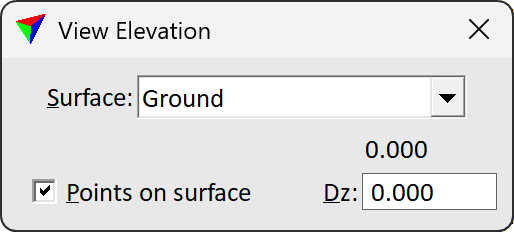
If you move the mouse pointer inside a view, the Surface elevation at the mouse pointer location is displayed in the dialog.
To place elements on surface elevation:
1. Select the View Elevation tool.
The View Elevation dialog opens.
2. Select a Surface from which to derive the elevation values.
3. Switch on Points on surface lock.
If you want to place elements above or below the surface, enter a Dz value. A positive value places the elements above the surface and a negative value below the surface.
4. Start the digitization of a vector element.
When Points on surface lock is on, TerraModeler calculates the elevation from the given surface for all data points entered in a CAD file top view. The data point is effected if the XY location falls inside the surface model area.
The view used for entering data points can be a top view which has been rotated around the Z-axis.
Make sure to turn off the Points on surface lock if you do not need it any longer. As it effects all data points, it may interfere with your normal work. The lock is turned off when the View Elevation dialog is closed.
The Points on surface lock can be switched on/off by using key-in commands/Spaccels:
• - switches off the Points on surface lock.
• - switches on the Points on surface lock and sets the Dz value to 0.0.
• - switches on the Points on surface lock and sets the Dz value to 2.0.