Slave computers
Slave computers category shows a list of computers that may participate in TerraSlave computation tasks. By default, the list shows only the local computer but you can add any network computer that you want to use for processing TerraSlave tasks.
A detailed description of TerraSlave is provided in the TerraSlave User Guide.
You can Add, Edit, and Delete computers by using the corresponding buttons in the Settings dialog.
To add a new computer:
1. Open the Slave computers category.
2. Click Add in the Settings dialog.
The Slave Computers dialog opens:
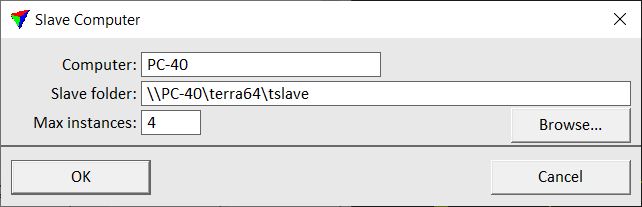
3. Define settings and click OK.
4. Close the Settings dialog in order to save the slave computer settings for TerraScan.
SETTING |
EFFECT |
|---|---|
Computer |
Name of the computer |
Slave folder |
Installation directory of TerraSlave on the Computer. The default local path is C:\TERRA64\TSLAVE. Use UNC paths for distant slave computers. |
Max instances |
Maximum amount of processor cores used for TerraSlave processing tasks. |
Slave computers are stored in a configuration file SLAVE_COMPUTERS.INF in the TerraScan installation folder. You can copy this file to other computers in order to make slave computer definitions available on them.